 Seal the Secret !!
2022-Aug-18

By:DALEEP SINGH
2021-Jan-24 10:01:58
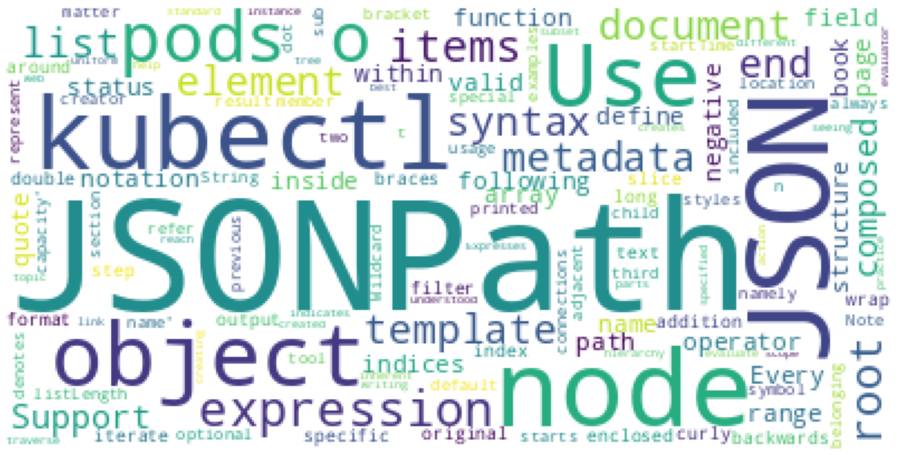
In the previous article, we discussed about JSONPath and also how we can traverse JSON data and get to the required values using various notations. Now moving ahead, we will apply all what we learnt to Kubernetes JSON outputs. The same commands/queries can also be applied to OpenShift as well.
Kubernetes/OpenShift uses both YAML and JSON formats to represent the information about various resources and JSONPath can be conveniently used to filter the information from massive output you get as result of the commands like kubectl get <resource_type> -o json
I will start with small examples and gradually showing some real world examples. For this demo, I have a small K8S cluster version 1.20 with 01 Master and 02 Worker nodes.
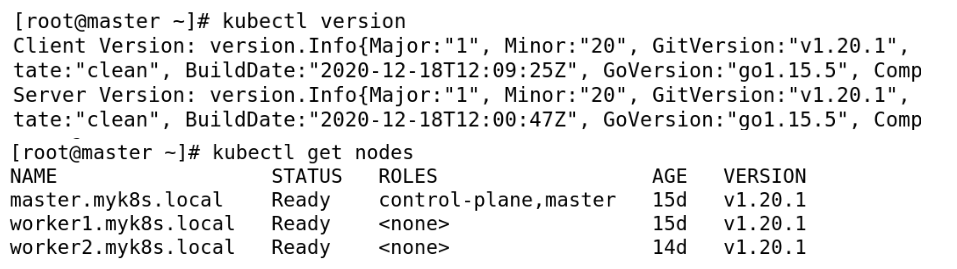
Previous command “kubectl get nodes” shows a brief output with list of node names, Status, Roles and Version. Now, if we want to get more information about the nodes, much more than what is shown with earlier command,
we can append -o json to the command.
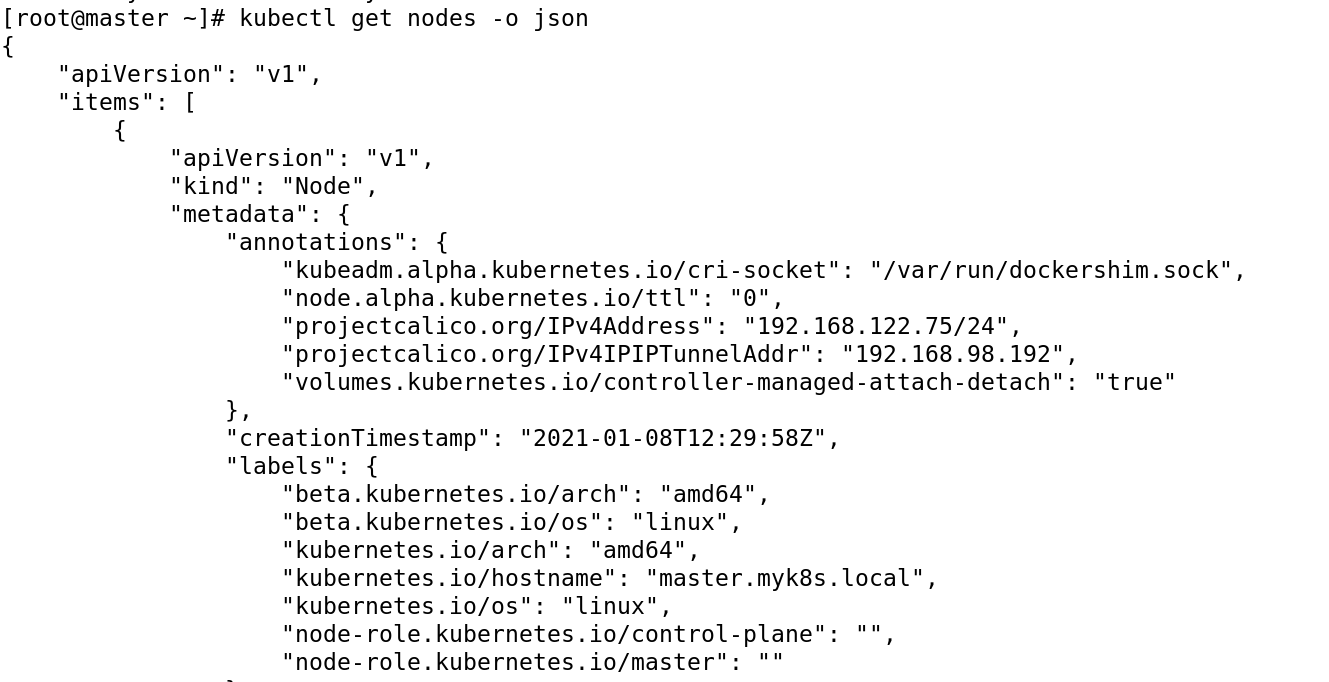
However, this is where things become hairy and you get massive amount of content being shown on the screen and if you have filter some information even in present small set of nodes, it becomes difficult. How to find relevant information other than manually scanning and filtering the information?
JSONPath to rescue!!

First let me copy the information to previous used online JSON evaluator ( https://jsonpath.com/ ), so that we are comfortable applying our knowledge to filter the data and then I will take you to use it with kubectl command also.
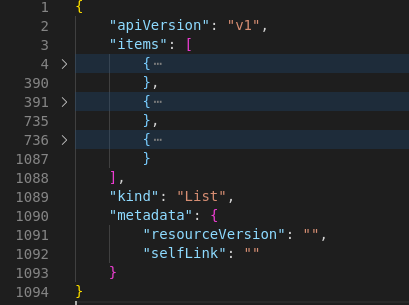
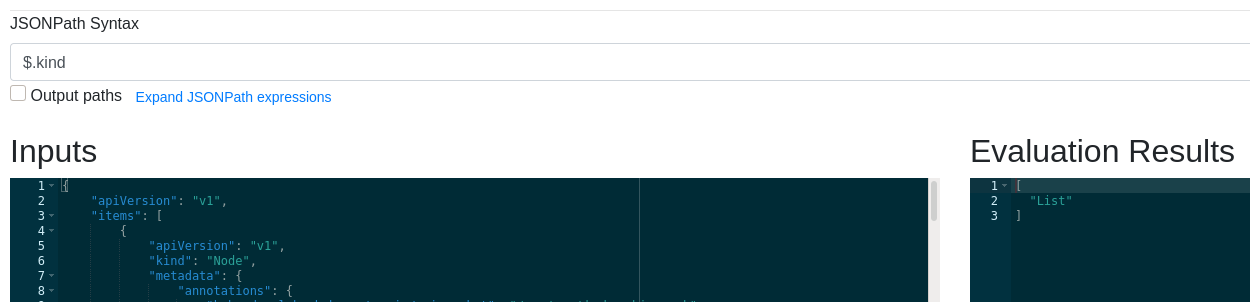
I copied the complete JSON output, which is approximately 1094 lines ( just for 3 nodes !). To make it more easy for you to understand JSON in the initial level, I would suggest to use some IDE editor which can clearly show the heirarchy and also allow you to collapse and extend the same to give more easier navigation and insight on elements/objects. I use Visual Studio Code for my development and such purpose. Below image clearly shows the the top level fields - apiVersion, items, kind and metadata. Under items, I have collapsed the node data so that you can understand the JSON structure.
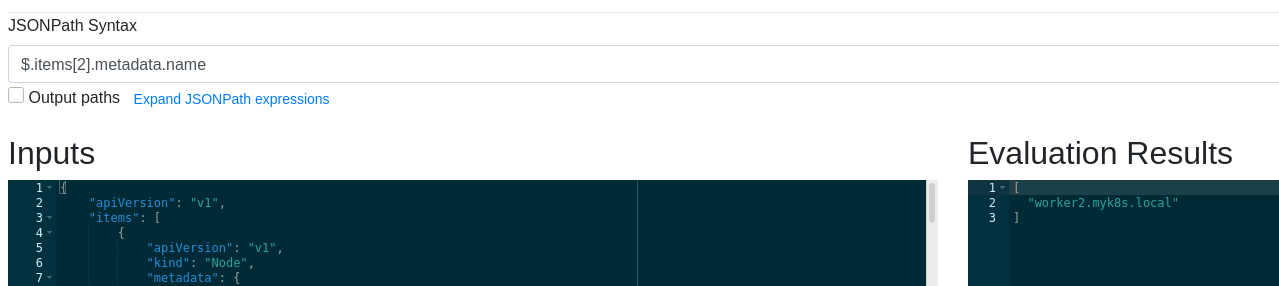
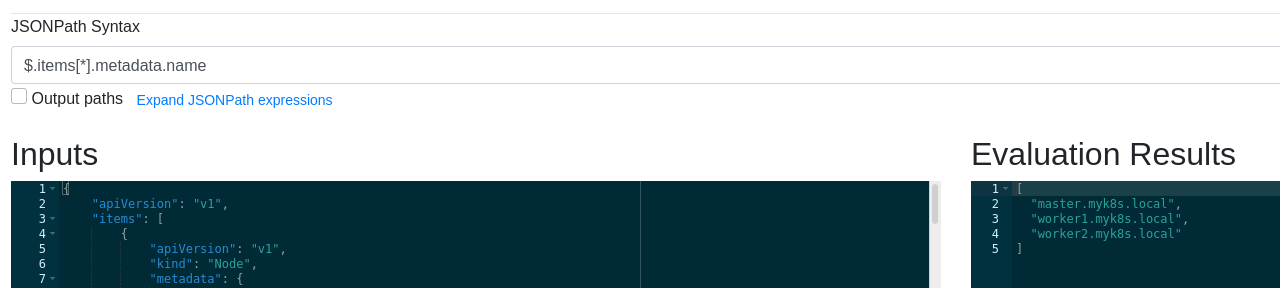
Now going ahead and using JSONPath query, below two outputs shows the use of JSONPath query to get the apiVersion and Kind of the data. The output clearly shows that it is a List of Items. Items is an array object, which can be referenced using the Index [0,1,2..n] of each element to select individual element or wildcard “*” to get all items in the list.
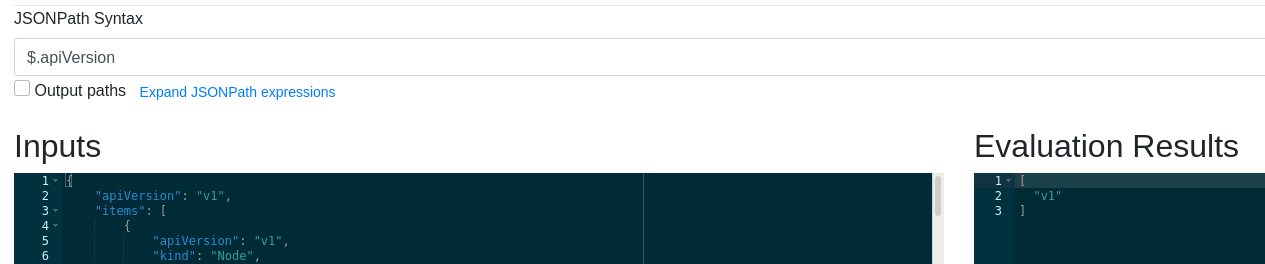
I used JSON query: <$.items[*]> & <$.items[2]>, which showed all elements and third item ( index 2).


The output is still too much to identify specific information, which means that we need to traverse more through data-set. To find the name of nodes which form the cluster, we can either use specific index numbers or as mentioned earlier, wildcard “*” to list all the node names.
You could try some more JSONPath queries to get comfortable with the structure and understand forming your own queries.
List IP Address of 1st object – $.items[*].status.addresses[0].address
Display Hostname of 2nd object – $.items[*].status.addresses[1].address
Display allocatable resources for 2nd object – $.items[1].status.allocatable
Display Kubelet Version for all nodes – $.items[*].status.nodeInfo.kubeletVersion
I hope you have got the hang of JSONPath queries and are ready to try some of your own. You would now be thinking of using these with kubectl command and getting the output, and that’s exactly what we are going to do next. Now to run the previous command with kubectl, you just have to copy the JSONPath query and put that in ‘{}’ and run with the kubectl command with “-o jsonpath=”. Isn’t it simple to understand now!!
#kubectl get nodes -o jsonpath='{.items[0].metadata.name}'
I have highlighted the changes you need to make to run the same query with kubectl.

You can observe in the previous output that even though, we got the desired result, command prompt is immediately followed, which doesn’t make the output neat. To ensure formatting, we can append newline character to add a newline after the output.

#kubectl get nodes -o jsonpath='{.items[0].metadata.name}{"\n"}{"\n"}'
Now we can even get multiple column output in the same query.

#kubectl get nodes -o jsonpath='{.items[0].metadata.name}{"\t"}{.items[0].status.addresses[0].address}{"\n"}'
You can see that I have just copied the commands from previous output and enclosed them in ‘{}’ and VOILA.. you have your JSONPath query.
Now, lets try this to get Hostname and IP Address information for all the nodes by changing the command to use wildcard character instead of specific index number.

#kubectl get nodes -o jsonpath='{.items[*].metadata.name}{"\t"}{.items[*].status.addresses[0].address}{"\n"}'
We do get the output, however, not in the desired format and order. All hostnames are listed followed by all the IP Addresses, which was not we were hoping. We need to use {range} statement to perform iterations on multiple items and this also saves us from using .items[*] with each query. The {range} statement executes till it reach {end} statement. We can get the desired output using below query:
#kubectl get nodes -o jsonpath='{range .items[*]}{"\n"}{.metadata.name}{"\t"}{.status.addresses[0].address}{end}{"\n"}'
If it becomes two long to fit in terminal, you can break it also with a newline character.
#kubectl get nodes -o jsonpath='{range .items[*]}{"\n"}{.metadata.name}'\
> '{"\t"}{.status.addresses[0].address}{end}{"\n"}'

Seeing the output, you might even be thinking of putting the Headings to the output, so that it is clear what each column refers. It is pretty simple to get custom columns with the JSON output. Use -o=custom-columns with kubectl get commands and specify the custom column names separated with JSONPath query by “:” followed by the same query we have been using so far.
#kubectl get nodes -o=custom-columns="Node Name":.metadata.name,"IP ADDRESS":.status.addresses[0].address

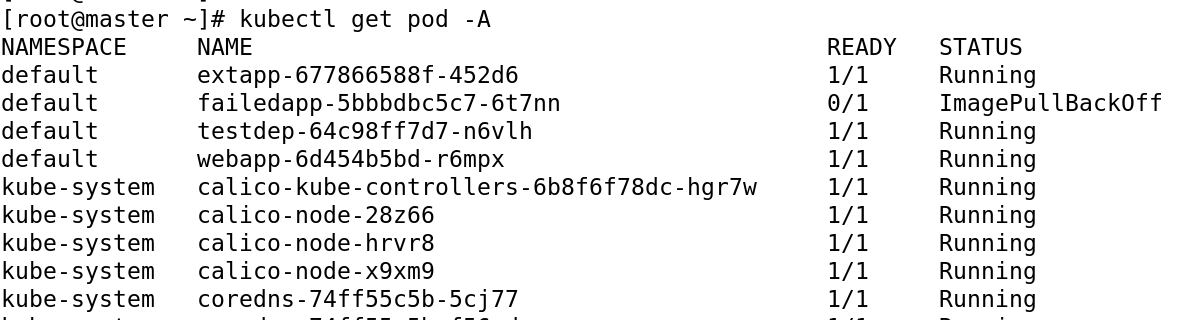
Lets play little bit with pods now. To showcase use of JSONPath with pods, I have intentionally failed a pod with incorrect image name and as a result, I get “ImagePullBackOff” for the pod. You might have n number of pods in your cluster and looking for pod name in each project or even browsing through the list will be cumbersome.
We now need to use JSONPath query to list the pod, however, only the one which has Failed or which doesn’t have the Status as Ready. So we have to use condition with JSONPath query. The syntax to check for a condition is to provide the query on the “[]” brackets and to put query with a “?” in like “[?(condition)]”. “@” is used to represent the the current object/element on which query is being run, which will be replaced by the items in the JSON output. Below shown command and output will make the application of condition with JSONPath more clear.
The first task is to to run and get the JSON output of the oc get pod command by appending -o json to it.
#kubectl get pod -A -o json
This will give a very long output, depending on the number of pods you have in your cluster. Our JSONPath query will be:
#kubectl get pods -A -o jsonpath='{range .items[?(@.status.containerStatuses[*].started==false)]}'\
> '{.metadata.name}''{"\t"}''{.status.containerStatuses[*].state.waiting.reason}}''{end}''{"\n"}'

Lets try one more query to find the Kubernetes service with type NodePort. We might have lot of services in our cluster and finding the one with different type along with other properties might be needed. Our JSONPath query will be:

#kubectl get svc -A -o jsonpath='{"\n"}{range .items[?(@.spec.type=="NodePort")]}'\
> '{.metadata.name}{"\t"}{.spec.clusterIP}{"\n"}'

I hope you would enjoy learning and trying JSONPath as much as I enjoyed writing the articles.
Happy Reading!!