 Seal the Secret !!
2022-Aug-18

By:DALEEP SINGH
2021-Jan-03 11:01:36
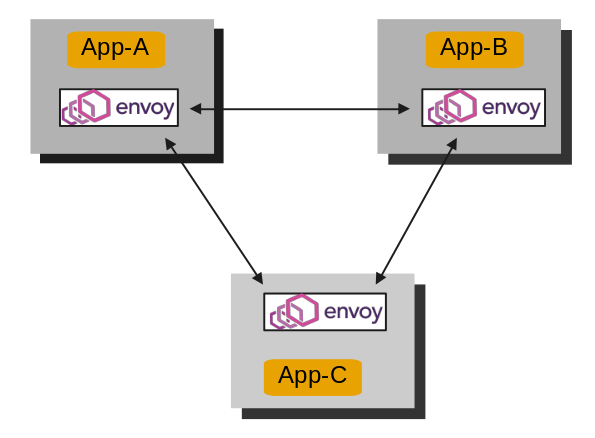
While going through some documentation for Istio, I came across some terms which got my interest piqued and I wanted to know more about it. Terms like Sidecar, Proxy and Envoy, which is a major component of Istio architecture design, led me to get into this article and one thing led to another.
In Istio sidecar, proxy and Envoy, they are one and the same and eventually Envoy is the main component that make the Data Plane in Istio/Service Mesh.
From Envoy official website (https://www.envoyproxy.io/ ), Envoy is an L7 proxy and communication bus designed for large modern service oriented architectures. Originally built at Lyft, Envoy is a high performance C++ distributed proxy designed for single services and applications, as well as a communication bus and “universal data plane” designed for large microservice “service mesh” architectures.
It runs alongside the primary application and abstracts the network layer by providing common features independent of the platform. With Envoy, all service traffic for cluster / application is routed through an Envoy service mesh which make it easy to observe and manage the traffic from a single place. Envoy is deployed as a secondary container, also known as Sidecar along with the primary application without rising a need to change the application code and these sidecars/proxies then talk to each other in a transparent manner to enable various functionalities, which earlier were handled/written by developers along with the business logic.
Some features at high-level are:
This is a very basic design which I have done here and it is mainly to focus on how requests flows from nodes in mesh through proxy.

More advanced designs could be found at https://www.envoyproxy.io/docs/envoy/latest/intro/life_of_a_request#network-topology
The documentation for Envoy on the official website is extensive. I thought to get some information out so that we can get started with Envoy and also start understand how it works. Envoy installation is pretty easy and straight-forward. Depending on your operating system and distro, you could choose the steps from https://www.getenvoy.io/
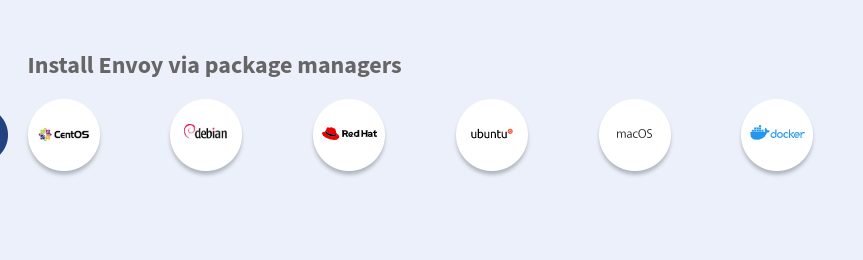
A Docker image is also available for download from Docker hub and you could download it on any platform where Docker is installed. The command to pull the image is:
#docker pull getenvoy/getenvoy:standard-latest
I have got Envoy installed on my Fedora box and the version I am using is
# envoy --version
envoy version: 8fb3cb86082b17144a80402f5367ae65f06083bd/1.16.0/clean-getenvoy-a5345f6-envoy/RELEASE/BoringSSL
Once Envoy is installed, we are ready to write our first example and bootstrap configuration. However, this is where the challenge start. The bootstrap example is not so easy and imagine what it would be to take it to the next level. I had to spend time here and understand to get it right. This was also one of the reason to get up and write this article.
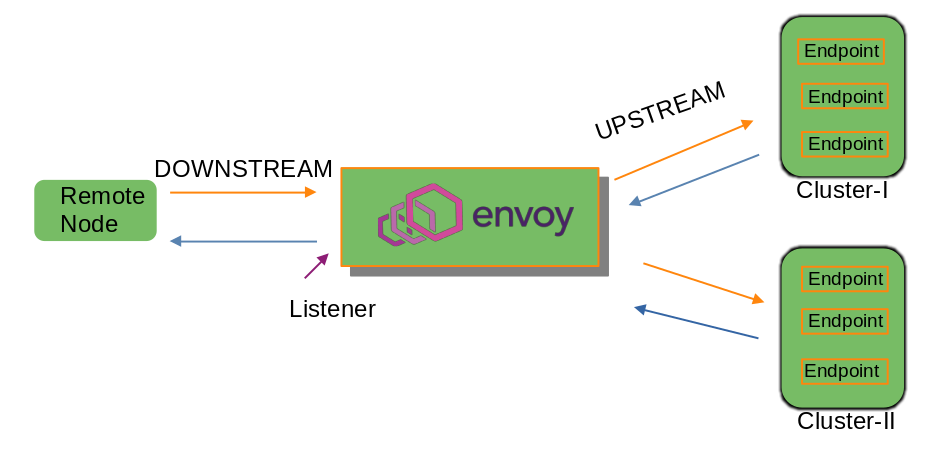
There are certain terms we need to be aware of before we dive and start writing our first yaml file. I will take it in the order we would assume our traffic direction would be.
Terms to know:
Downstream: node/application connecting to the Envoy proxy.
Listeners: module responsible for listening and receiving the traffic on the Proxy accepting it and processing further.
Upstream: Node to which Envoy forwards the traffic to after processing the request from Downstream.
Cluster: Logical grouping of service or endpoints to which Envoy will forward traffic to.
Filter Chains: group of filters implementing logic
Endpoints: application nodes where actually the logic is applied and they are grouped into clusters. They are also toward Upstream.
I have tried to get all these in place by small diagram below:
We can start Envoy either using Static configuration or we could provide Dynamic configuration. The example I have taken in one of a Static configuration.
Explanation of a simple static Bootstrap YAML definition:

The yaml file starts with static_resources tag which defines it to be a static configuration and is configured statically when Envoy initiates.
Then, we need to define listeners and clusters. Listener would have the section which defines where Downstream traffic is received and clusters would define the Upstream path to forward the traffic to. All paths from listeners are matched and routed to the cluster defined in clusters section.
To make it easy and understandable, I put lot of comments in my first_example.yaml, so that we can quickly identify what it is intended to perform.
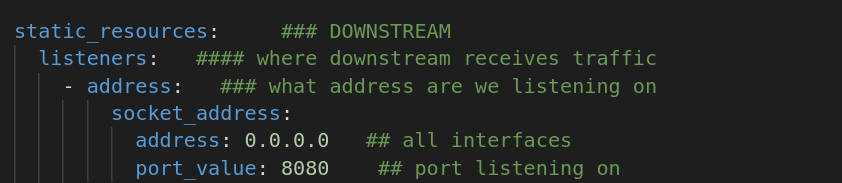
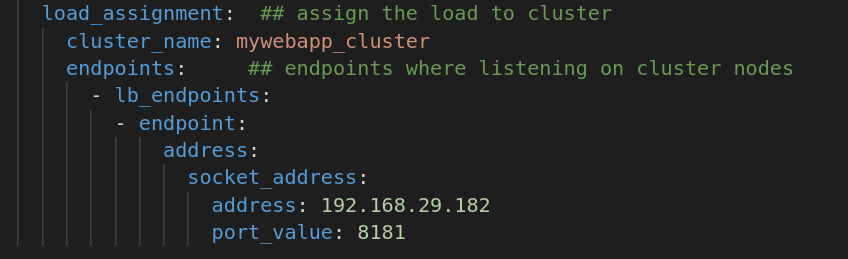
From above image, it is clearly seen that listeners is where we define the address and port on which Proxy is receiving the traffic.

The filter_chains section define the filters used to filter the traffic received from downstream. The present example uses HTTP filter. In addition to HTTP Connection Manager filter, Envoy also has lot of other filters ( https://www.envoyproxy.io/docs/envoy/v1.16.0/configuration/listeners/network_filters/network_filters ).
virtual_hosts section is important as this is the place you would define the domain to match to and also cluster to which the data is forwarded to.
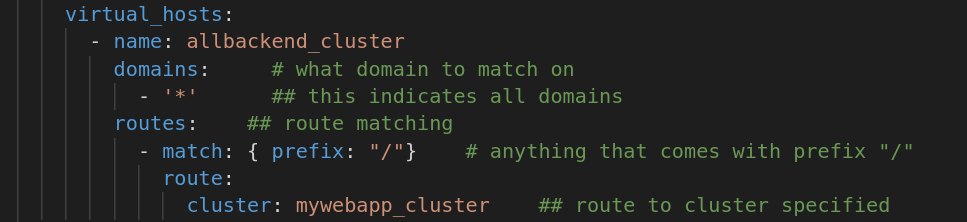
The clusters section is the one which is going to receive the traffic Upstream ie forwarded from the proxy.

Notice the name, which matches the name under routes under listeners. We also define the load balancing policies and timeout etc here.
Below this, we have load_assignment, which defines the endpoint definitions on which eventually the traffic will be received and served from.
To make it easier for you to try this, I have uploaded the first_example.yaml at my git repository at <Git>
You might say that what is new in this!! You are simply receiving a traffic on one port and forwarding it to another. I completely understand this reaction, however, my intention here is to just help you understand the flow of Envoy definition file and not to confuse at this stage. Later on we will see some more configurations.
Now that we have envoy proxy installed and the yaml file ready, let us to run it and check the status.
Before running the configuration, I am going to validate the configuration using the command:
#envoy --mode validate -c <config-yaml-file>
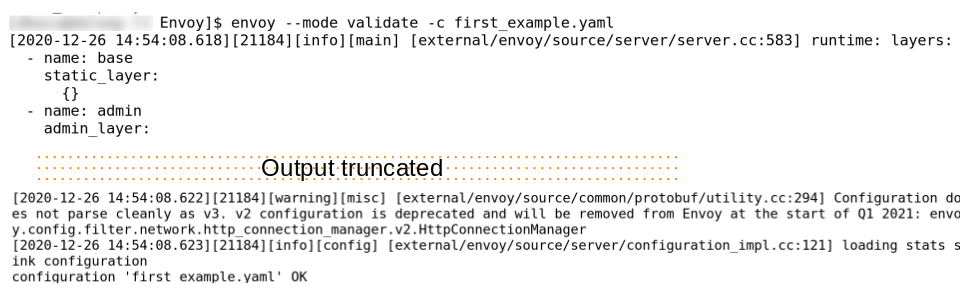
As the configuration seems good, we are ready to run the first_example.yaml.
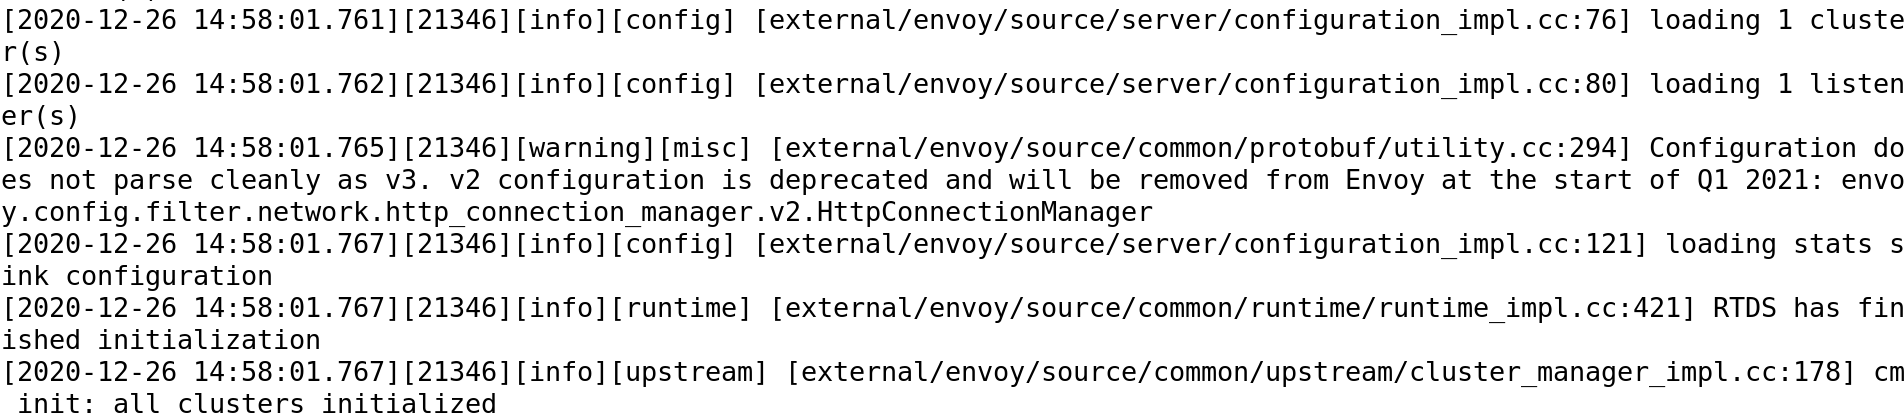
#envoy -c first_example.yaml
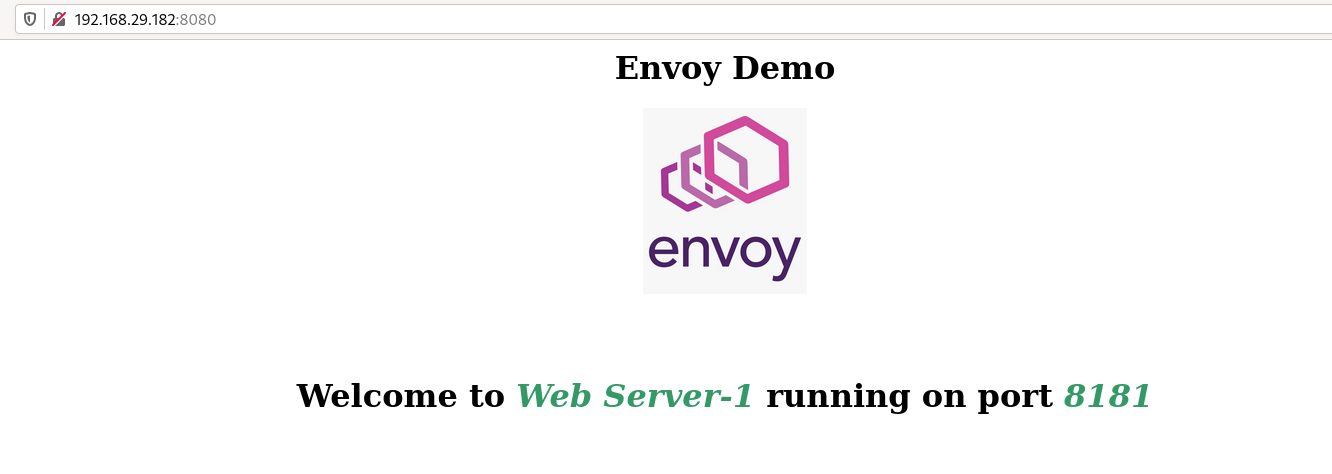
As we have configured Envoy to listen on port 8080 and forward the traffic to a web-server running on port 8181, the web request to the IP_Addr:8080 results in the web page being displayed.
Also to make it more transparent, below is the netstat output showing that Envoy is listening on port 8080 and web service is running on port 8181.

This brings us to end of this small demonstration, however, opens lot of new avenues for us and will lead us to many new things. I hope this small demo would be enough to interest you in knowing more about Envoy proxy. I would be adding more articles.
Thanks and Happy Reading!!