 Seal the Secret !!
2022-Aug-18


By:DALEEP SINGH
2020-May-15 11:05:43
We saw creating and managing containers in my earlier blog ( Podman – a container runtime), however, other than creating simple containers, podman also has ability to manage pods.
What is a Pod?
Pods are created and managed using Kubernetes API and are a group of one or more containers sharing the same network, pid and ipc namespaces.
Podman created pod are similar to what Kubernetes does for pods. You can connect to the IP Address allocated to the pod and all containers in the pod will be able to connect with as due to the shared network namespace.
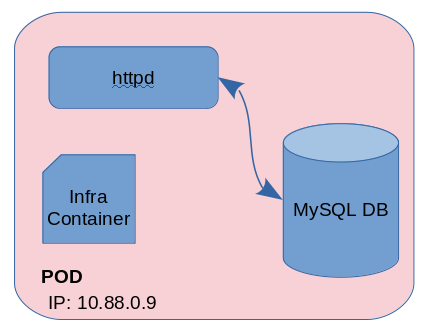
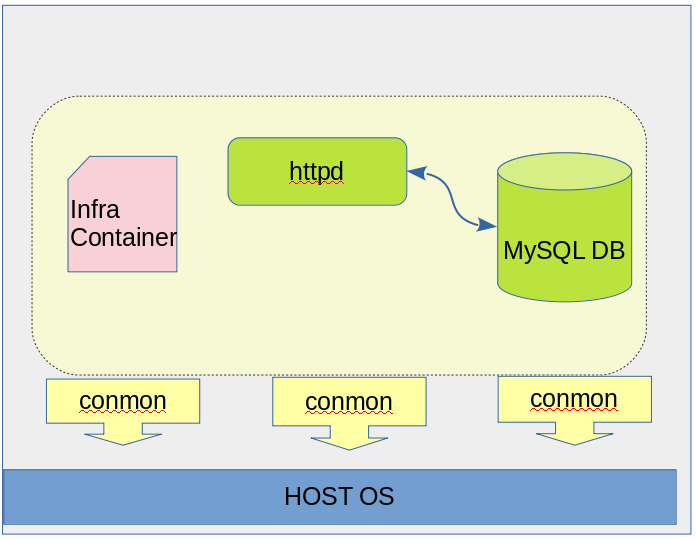
As seen in the above diagram, every pod created will also include one “Infra Container”. This infra container is created using k8s.gcr.io/pause:3.1 image and acts to hold namespaces associated with the pod. This allows the pod to run, even if all associated containers are in stopped state.
Podman being daemonless doesn’t mean that there is no daemon monitoring the pod's containers. For this purpose, another process is automatically started with the start of each pod and this process is called conmon, Container Monitor. conmon is not only responsible for monitoring the pod's containers, it is also the link between the container manager and the container runtime ( runc ) and thus ensures the correct start parameters for the container runtime. Going forward I will show the conmon process and how it is tied up with container process.
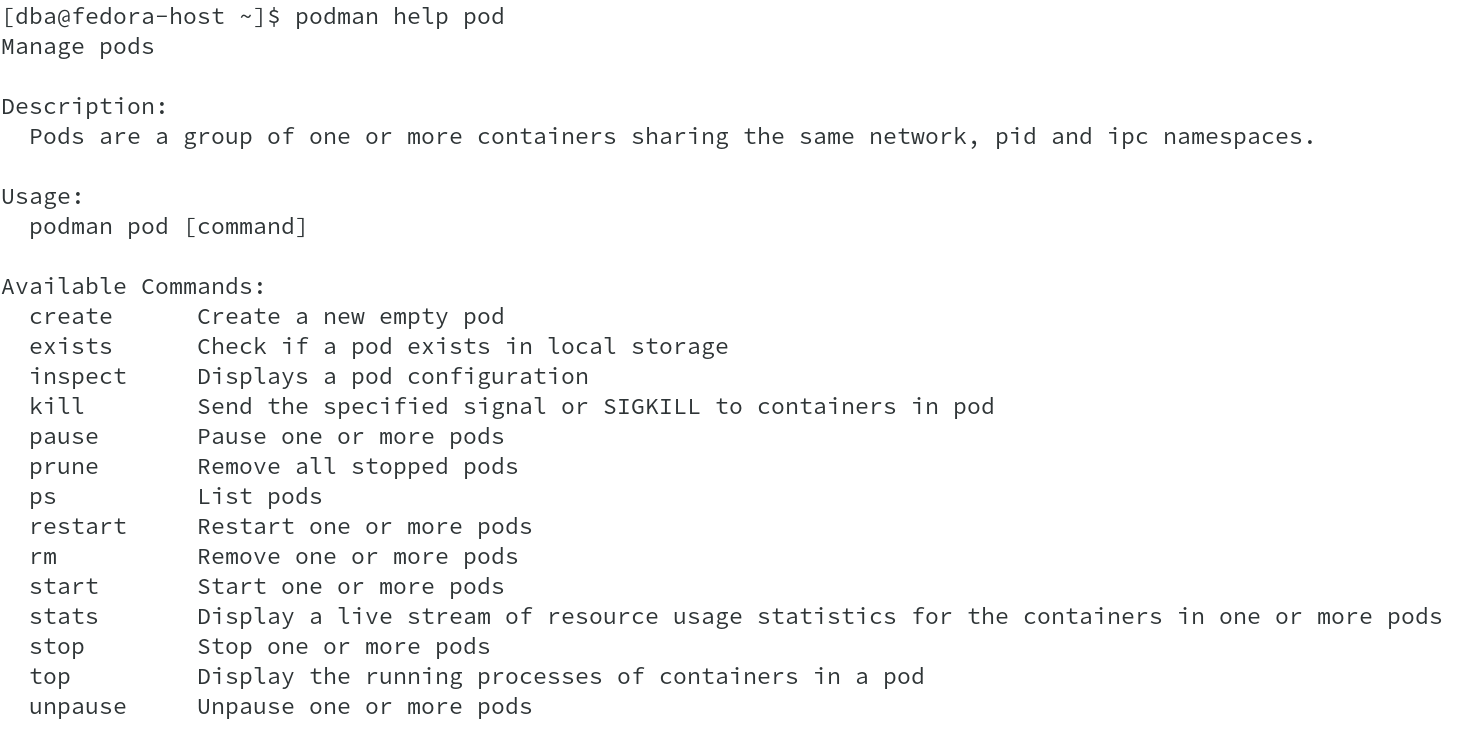
Podman provides with a pod sub-command to create and manage pods. Using podman help with pod sub-command gives you list of possible commands with it.
For this demo, I am using two images, httpd and mysql, both running as individual containers in a pod. You should be able to see k8s.gcr.io/pause image also in the list, using which Infra container is created.

Let us create a pod using podman pod create command. The command returns the Pod ID to us on pod creation.

You would have also observed that, even though we have not created any container yet, still it shows the container count as 1. This is the infra container we talked about earlier. Using podman ps command with option --pod, we can see the infra container. The name of the container indicate the pod to which this infra container is associated with and also shows that in NAMES column.

From the above output, we can see that a pod with name “my_first_pod” has been created and has one container using k8s.gcr.io/pause:3.1 image.
Let us go ahead and add containers to this pod. We will need the pod name to associate the new containers with it. I will add httpd and mysql containers one by one.

Observe the container count in the below output. This indicates that our pod “my_first_pod” which has POD ID 0b9a4a99f42b, now has three containers, one for Infra, httpd and mysql.

I used the earlier discussed command to get the list of containers in this pod. You can also get the selected colums using --format switch. For example, to get Container ID, Image, Container name and Pod ID, you can use:
#podman ps -a –pod – format “{{.ID}} {{.Image}} {{.Names}} {{.Pod}}”
Now that our containers are running in a pod, let us see, how we can access them and also try to test, what we have seen about pods so far.
Let us first start by doing an inspect on our pod by running:
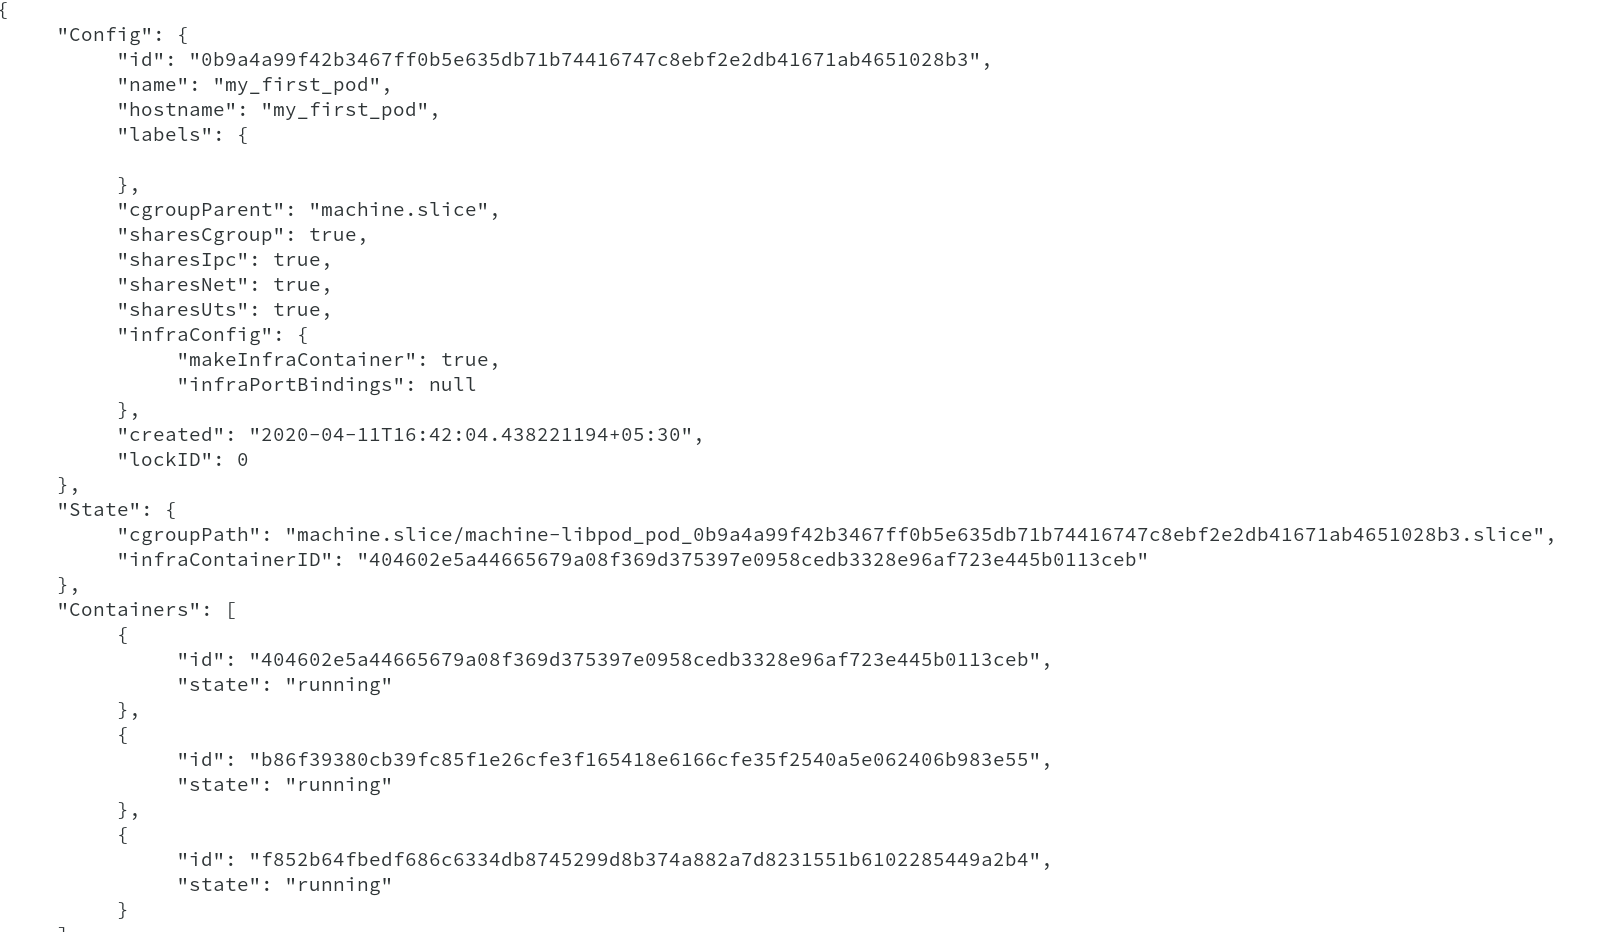
#podman inspect my_first_pod | less ( The output is appended below which clearly shows three containers running in it and also observe the Infra Container ID)
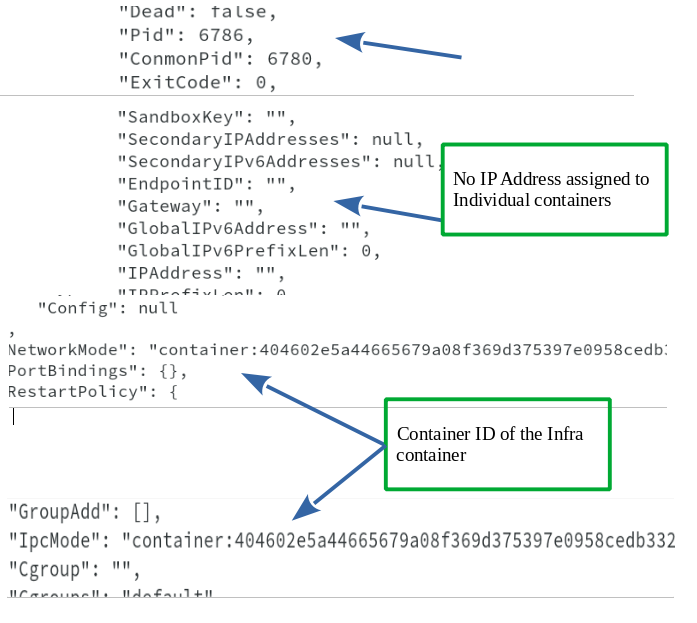
As we have discussed, the network namespace is shared between the containers is the pod and the IP address is associated to the Infra container, inspect on infra container will give us the IP Address allocated. Doing inspect on other two containers, shows that IP Address is not allocated to individual containers.

Let me show you some more information from podman inspect command on Infra and one of the application container which tells how the containers are created and share the namespaces.
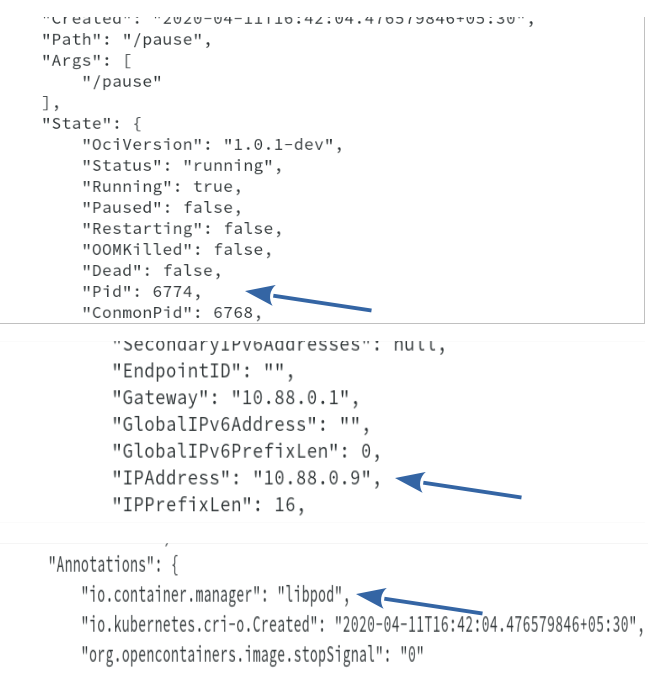
infra Container Inspect : you can see the Infra container PID and conmon PID. The IP address assigned can be seen.
httpd Container Inspect : the ouput clearly shows that IP address has not be assigned to the httpd container and also network and IPC are connected to the infra container. Container PID and conmon PID is also shown.
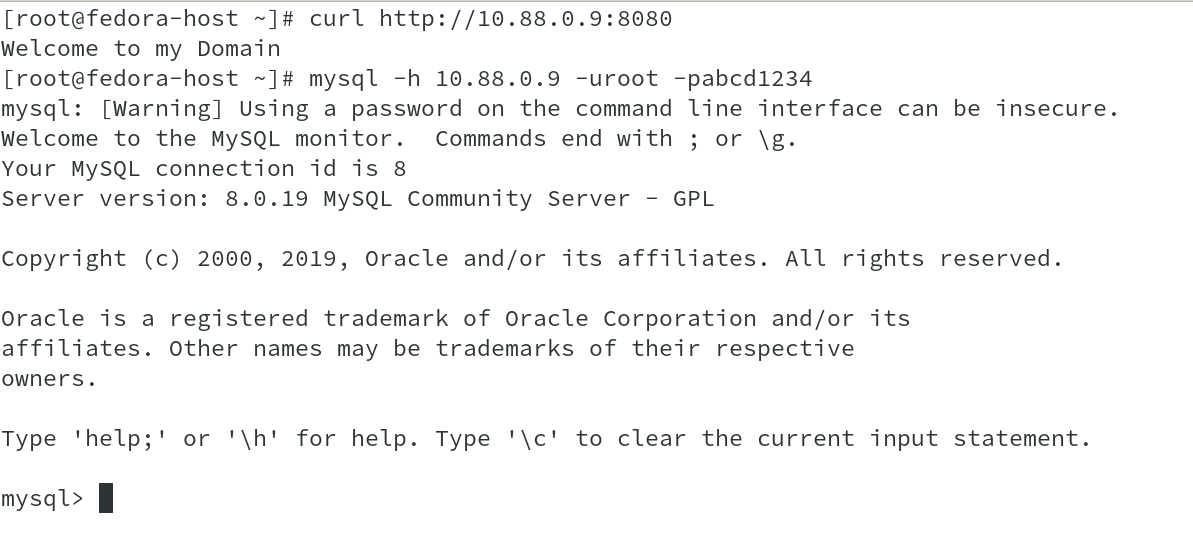
Now that we have the IP Address, we can connect to both of the containers using the same IP Address on different ports, namely port 8080 for httpd ( this is a customized image listening on port 8080/TCP ) and port 3306 for mysql, or you can also use the IP address to create a child process using podman exec sub-command.
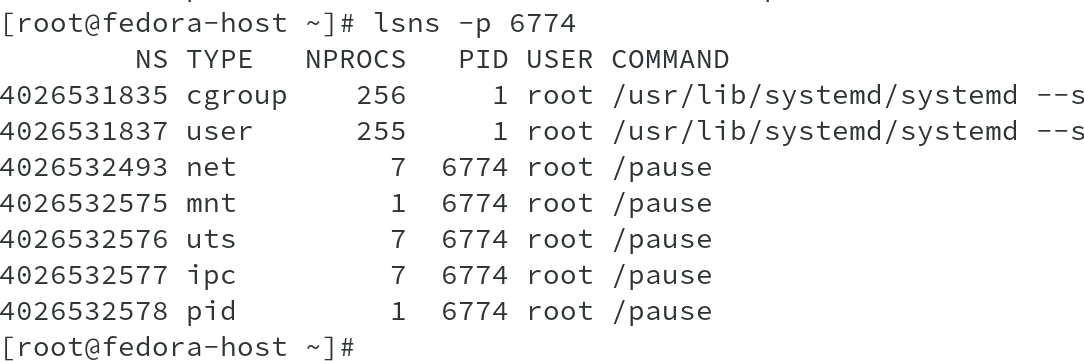
Let us now check the namespaces which are used to provide pod and container environment. The output clearly indicated that NET,UTS and IPC namespaces are shared between all the containers.
I am going to get the PID's of all containers, to get list of namespaces associated with respective PID's.

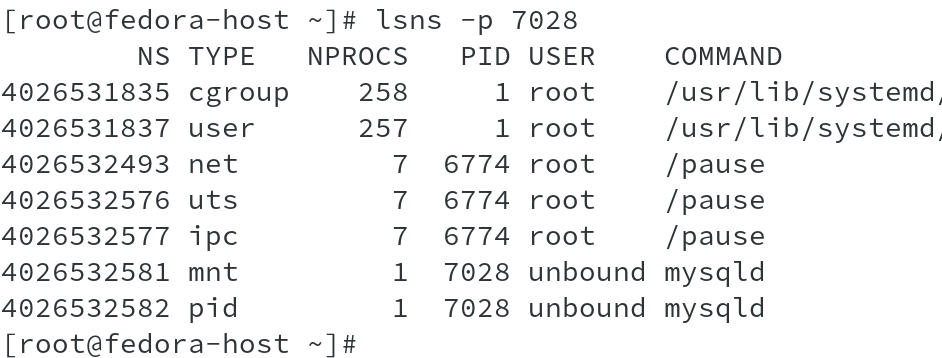
Now that we have the PID's, running lsns -p against each PID will list out the namespaces associated with each PID. Below shown is the output for all the containers, first being Infra container.
Namespaces for httpd container:
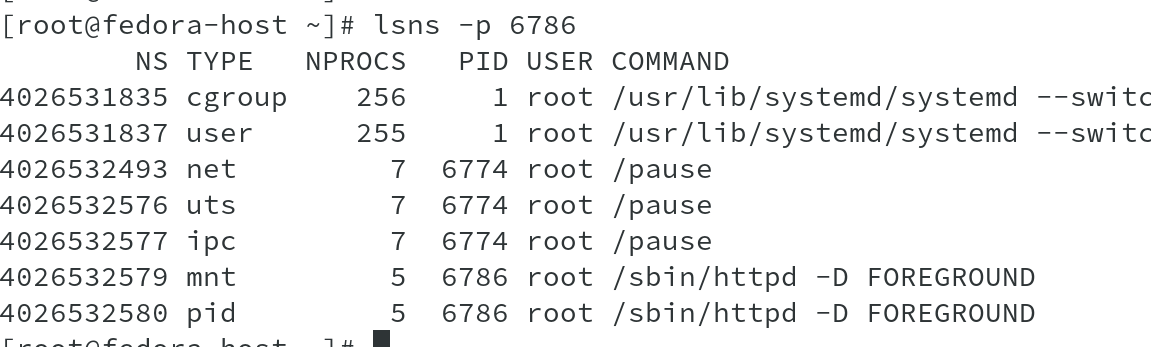
Namespaces for mysql container:
To show the relation between podmon and the containers running, I went ahead to get the PID’s and conmon Pid using podman inspect command against each container. As we saw earlier, each container had its own conmon process running which was controlling the container process, we can clearly see that relation between it from PID and PPID column in ps output. The conmon process is the Parent process for the container process. The below output shows for all three containers starting with Infra container.
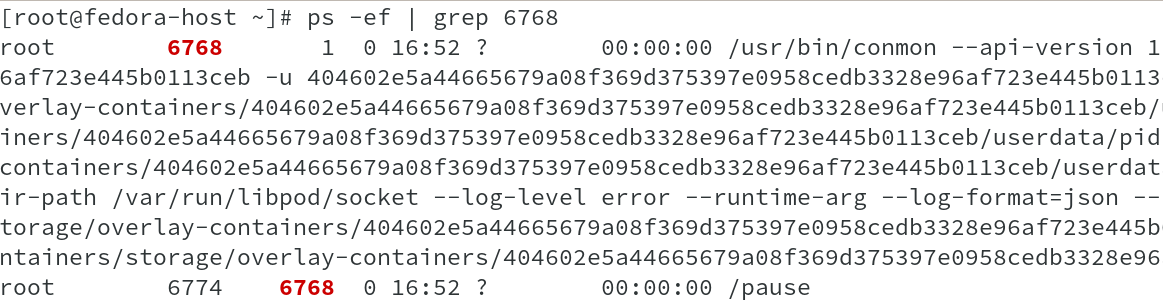
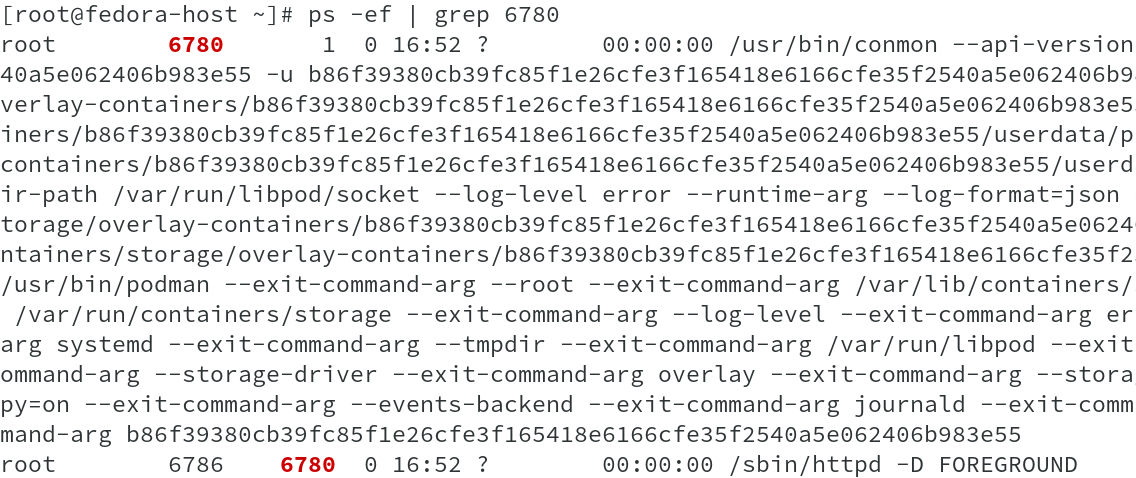
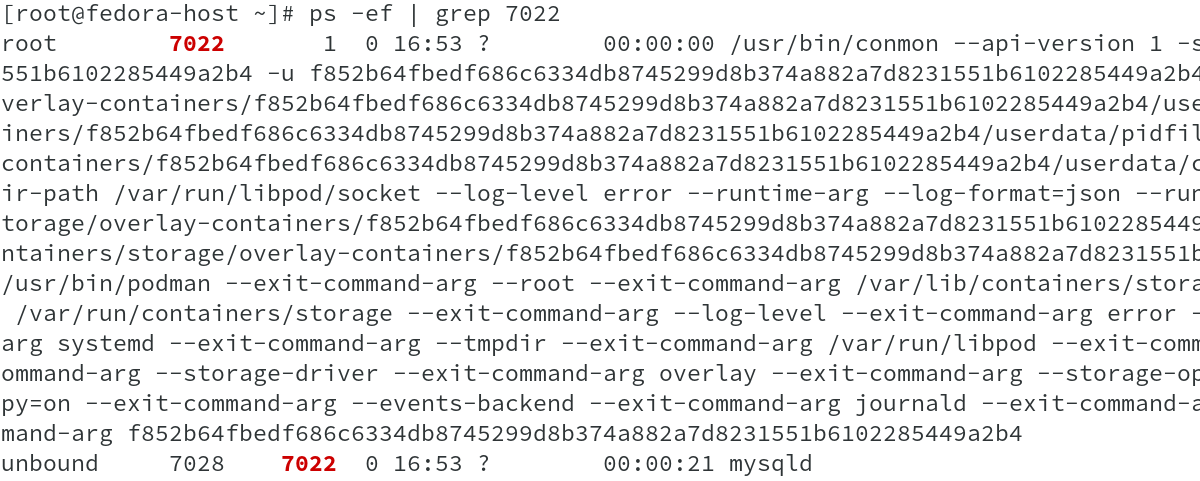
All the above three output shows that conmon which is binded to PID 1 is the parent process for the actual container process and also each container has its own conmon process.
Now that we have seen how to create a pod, add containers to the pod, access those containers using the IP address of the infra container and also brief on shared namespaces and conmon process, it is time to do clean-up by stopping the containers and eventually deleting the pod.

Before deleting the pod, we need to stop and delete all the containers and then delete the pod.
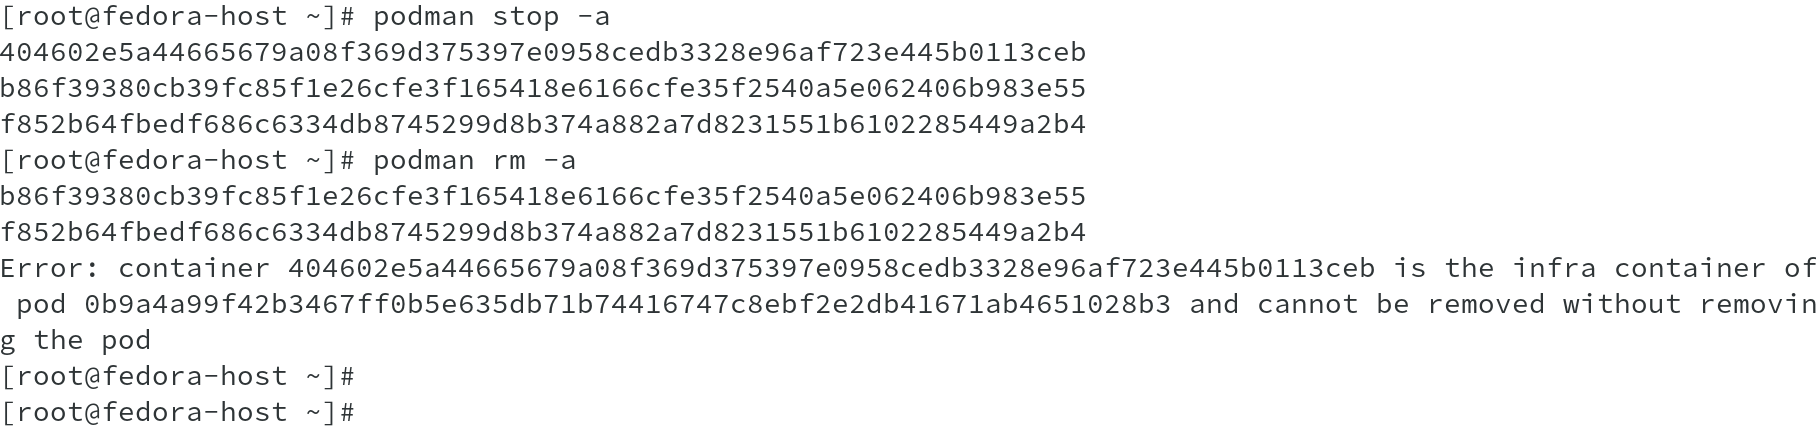
Now go ahead, delete the pod to complete the clean-up.

This is all in this article. Go ahead, create pods with Podman !!